
 Yahoo Autos
 How To Bleed Your Brakes


When you press on your vehicle's brake pedal, it's brake fluid that does the work. Your leg action moves a plunger in the brake master cylinder that pumps brake fluid through the brake lines and out to the brakes. The fluid applies pressure to the brake pads, which squeeze your vehicle's brake discs (or move brake shoes into contact with the brake drums) and slow you down.
Brake fluid is the lifeblood of the brake system, and it is designed to work properly for several years before needing replacement. Over time, brake fluid loses its moisture resistance and begins to absorb small amounts of water, which not only reduces brake performance but also can corrode key parts of the system. Replacing the fluid at appropriate intervals is a cheap and effective way to ensure that you're motoring in a safe vehicle, and it also can help you avoid having to pay for expensive brake repairs later on.
An essential part of replacing brake fluid is bleeding the system. That simply means ridding the brake system of trapped air, but some of the old fluid is expelled as well. (Fully replacing the fluid is essentially an extended bleeding session.) Bleeding the brake system is something that anyone who's even marginally handy with tools can accomplish at home with the help of an able assistant. Here's how to bleed your brakes in a dozen easy steps.
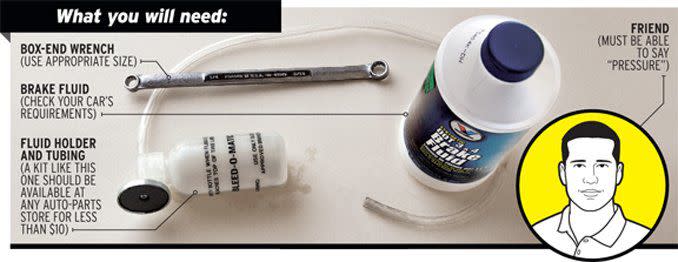
STEP 1: Consult your owner's manual to see which specific type of brake fluid your vehicle requires. (It's also good to know at what intervals the manufacturer requires that it be replaced.) There are several different types of brake fluid, and they don't mix well. Head down to the auto parts store or dealer's parts department to pick up the correct fluid before you start working on the brakes. Good-quality brake fluid isn't expensive; you'll probably need two or three 12-ounce cans to bleed the system.
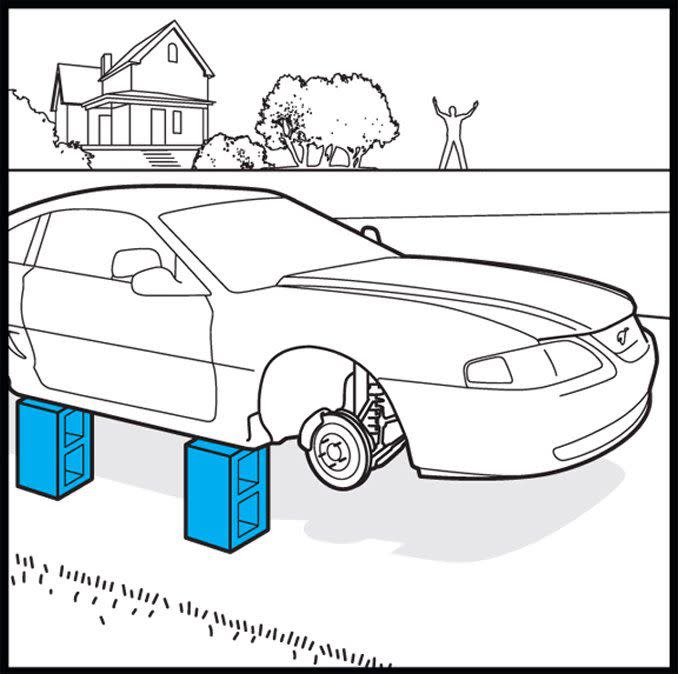
STEP 2: Jack up your vehicle on level, solid ground (preferably a garage floor or driveway) and support it with four jack stands placed at the jacking points shown in the owner's manual. (You can always prop it up on cinder blocks if you want your neighbors to start worrying about their property values.) It needs to be safely on solid footing while up in the air; the process of bleeding brakes will have you climbing partially under the car at times. Remove all four wheels.

STEP 3: Locate each of the four caliper bleeding screws, one of which is shown in a typical location in the above illustration. (Drum brakes also have similar bleeder screws.) Attempt to loosen them gently, but if they resist, don’t twist the wrench with all of your might. If they're difficult to break loose, spray them with penetrating oil, let it soak in for a half-hour, and then attempt to loosen them again. If they snap off or strip, stop at once and take your vehicle to a shop and let a professional deal with the issue. Once you've loosened each bleed screw, snug it back up again; you'll be bleeding one brake at a time, and the other screws need to be closed so no air gets sucked into the system. Air bubbles are the enemy of brakes systems; they make your brake pedal feel mushy and reduce the system's performance.
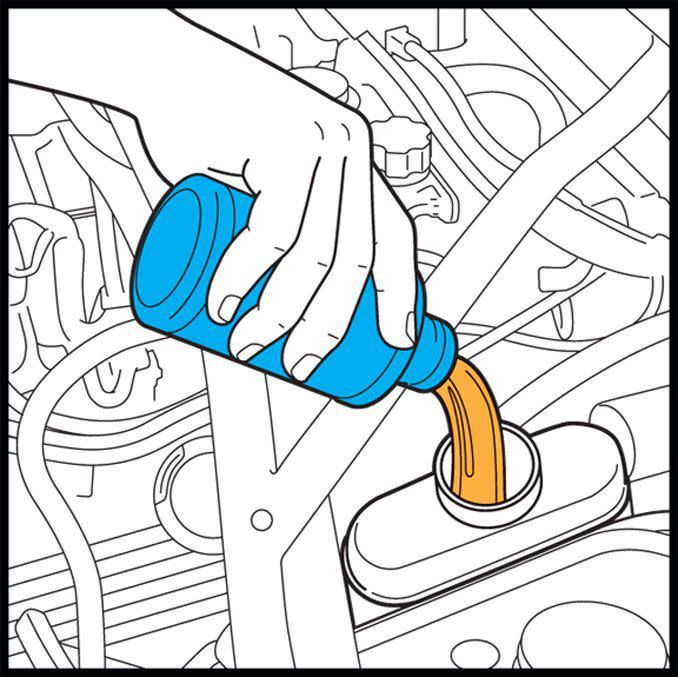
STEP 4: Get the hood up and check the fluid level in the brake master cylinder reservoir. Its location is likely shown in your owner's manual. Add fresh fluid if it’s lower than the marked “full” line on the clear reservoir. Make sure you've got the correct fluid for your vehicle (see step 1). During brake bleeding, the master-cylinder cap should be left unscrewed but still in place atop the reservoir. Each brake must be bled in the correct sequence. Generally, you bleed the brake most distant from the master cylinder first, but some cars require a different order. That information is available in the factory manual or from your dealer’s service department.

STEP 5: Fit one end of a piece of clear tubing (usually ¼-inch in diameter) tightly over the end of the bleeder screw of the first brake you'll be bleeding, and put the other end into a catch container-a discarded beer can or plastic soda bottle will do. Make sure the tubing is long enough so that you can hang the catch container above the height of the bleeder screw; this will keep any air trapped in the tubing from sneaking back into the caliper.

STEP 6: It's time to get your able assistant involved. With the car’s engine off, have your helper pump the brake pedal for several strokes until they feel solid resistance underfoot. The assistant should shout “Pressure!” when a firm pedal is achieved. Have them maintain pressure on the pedal.
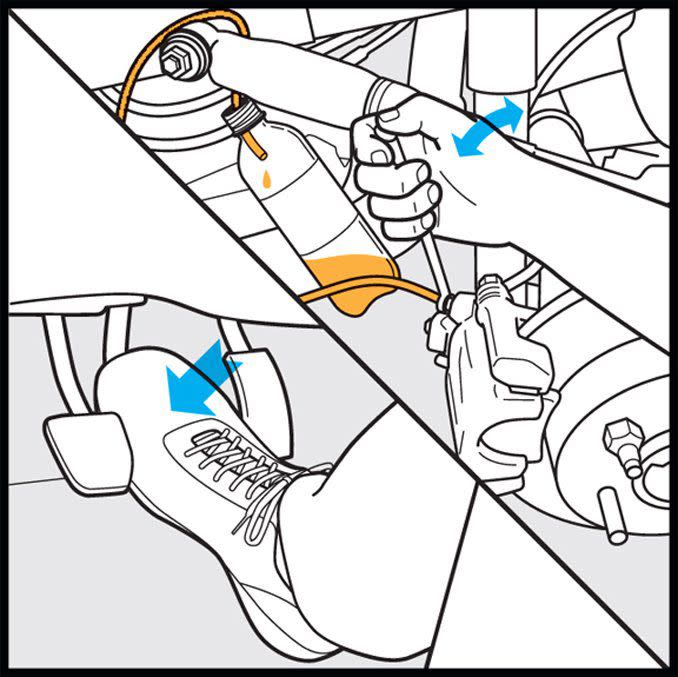
STEP 7: While the assistant maintains pressure on the pedal, open the bleeder screw a small amount. Fluid will pass through the clear tube, and the pedal will begin dropping toward the floor. Have them continue pressing the pedal towards the floor.
STEP 8: Just before the pedal reaches the floor, the assistant should yell “floor!” or "down!" Quickly close the bleeder screw the moment that you hear that warning. Now check the master cylinder reservoir’s fluid level; add brake fluid if necessary to keep it topped up.
STEP 9: Repeat steps six through eight at least five times at that wheel location until the stream of fluid flowing through the clear tubing is free of air bubbles.
STEP 10: Now repeat steps six through 9 at the remaining three brake locations in the proper sequence. That means moving from the wheel farthest away from the master cylinder to the one next closest and so on.
STEP 11: When you've completed bleeding all four brakes, ask your assistant to apply full effort to the brake pedal followed by an abrupt release of that effort. Observe the motion of the fluid in the master-cylinder reservoir. If there is a substantial fluid eruption, there are air bubbles still trapped in the system. You must repeat the bleeding procedure to remove that air. A modest disturbance in the fluid, however, indicates a properly bled brake system.
STEP 12: Double-check that all the bleeder screws are tight. Again, apply solid pressure but not all of your strength to tightening them-you don't want to snap them off-before reinstalling the car’s wheels. Congratulations, you're done!

('You Might Also Like',)
