
 Yahoo Autos
Rebirth of an American Classic: 1933 Harley-Davidson VL
What's on your motorcycle bucket list? At the top of mine was the dream of building a bike completely from scratch. Sure, I've customized and maintained many different motorcycles over the years, but none of them has ever been a complete ground up build. Bolting on some chrome doodads may radically change the look of a stock bike, but it just isn't the same as putting together every nut and bolt yourself. A little over a year ago, I picked up the first two pieces of my dream bike, a set of matched 1933 Harley-Davidson VL engine cases, and starting a 14 month journey into the world of antique motorcycle restoration.
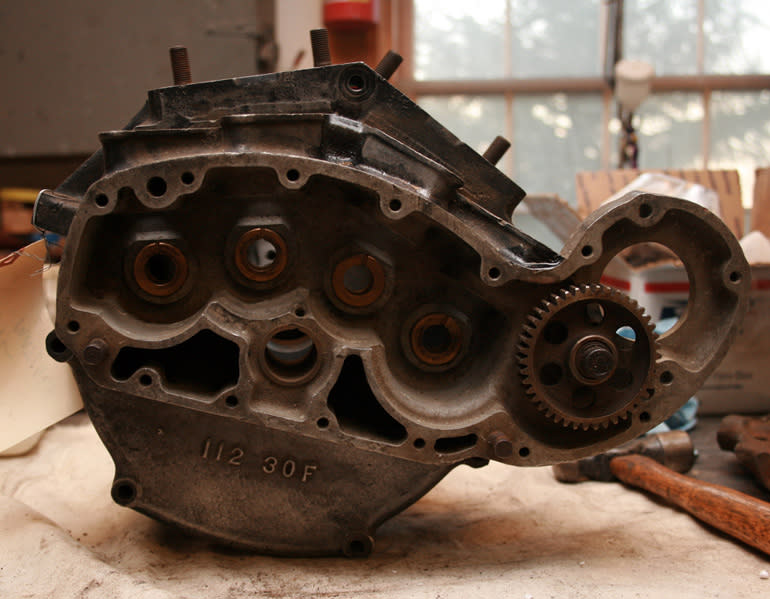
Who knows when this engine was last together, let alone in a running motorcycle. Photo by Panhead Jim.
For the uninitiated, building a vintage motorcycle can be a daunting task, especially if you want to finish it in a reasonable amount of time. I know many vintage enthusiasts who have spent 20 years (or more) buying all the correct original parts to assemble a perfect motorcycle. This process may yield a bike that looks like it just rolled out of the factory, but I knew from the start that I didn't want to wait 20 years to get my first ride. So I decided that I would buy original parts for the major components (engine, transmission, frame, front end, brakes and wheel hubs), and then finish the bike out with a combination of original or quality aftermarket parts based on availability. I can then spend the next 20 years riding the bike while I trade out aftermarket parts for original ones.
MUST SEE: This Old Bike: RideApart's 2004 Yamaha R6 Project Moto | RideApart
Luckily there are several companies that specialize in VL parts, which is surprising for a model that was only built from 1930-1936 and in limited numbers due to the Great Depression. Companies like Replicant Metals and Competition Distributing make small runs of parts which look and function just like the originals and are available at a reasonable price. I'm building a rider, not a museum piece, so the idea of having things like a new fuel tank and not one filled with rust and pinholes just made sense.
Another concern was the cost of building a 80+ year old motorcycle. To help keep from going into too much debt at once, I spaced the build out starting with the drivetrain and completed it before moving onto frame, wheels, etc. This plan worked fairly well until I got into assembling the motorcycle and discovered that all those parts I'd been buying needed specialty fasteners and brackets to mount to the bike. Every time I got started putting something together, there was always some oddball washer or bolt with unusual threads (Harley liked to use 1/4-24) that would shut down the whole project while I searched the internet, ordered a $3 fastener and then waited for it to arrive. Often, I just moved to a completely different part of the bike so I could keep making progress.
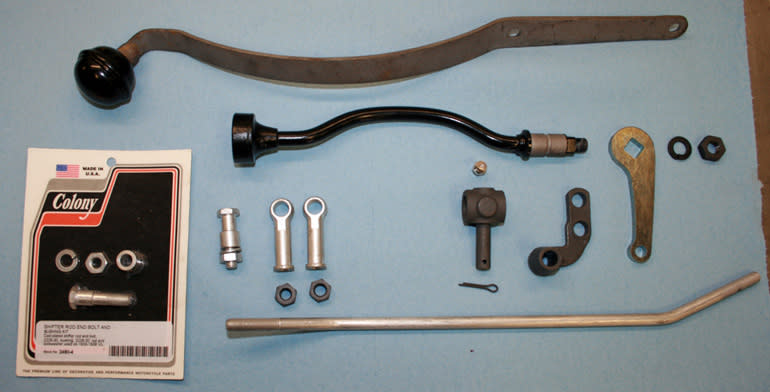
Old Harleys use all sorts of special fasteners and linkages. All these parts just handle the shifting linkage to the transmission. Photo by Panhead Jim.
Beginning with the engine and transmission, I really got to see what motorcycle restoration is all about and it can be summed up in one word: cleaning. By cleaning, I don't mean spraying some degreaser on it and calling it good—it's a tedious process of scrubbing with lacquer thinner, bead blasting, more lacquer thinner, warm soapy baths and lots of compressed air. The real advantage to this method is that you get to know every part very intimately. This saved my bacon on more than one occasion, the biggest being when I found a crack in the bottom of the engine case. It was easy enough to weld with the engine completely apart, but if I had missed it until after I'd finished the bike, there would be no way to fix it without removing and disassembling the engine.
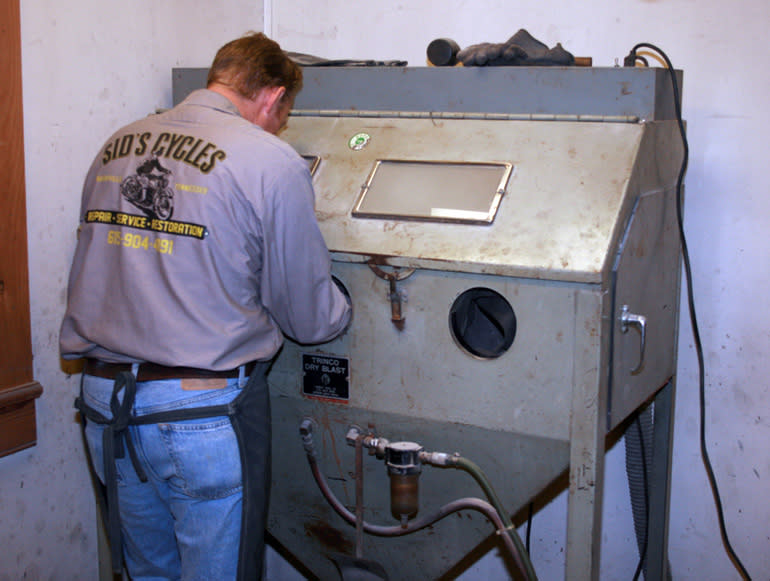
If you are going to rebuild an antique motorcycle, be prepared to spend many hours working with a blast cabinet. Photo by Panhead Jim.
One thing I knew for sure was that rebuilding the motor was best left to someone with years of experience and the proper tooling to do the job right. So after cleaning and repairing all the components, I gladly sent it off to a professional. That left me to tackle the transmission, which was by far a much easier task. I enlisted the help of Tom Feeser from Replicant Metals and together we made quick work of the rebuild. There's no substitute for experience and Tom has years of it when it comes to VL's.
MUST READ: Odd Bike: The Confederate Wraith – Part II | RideApart
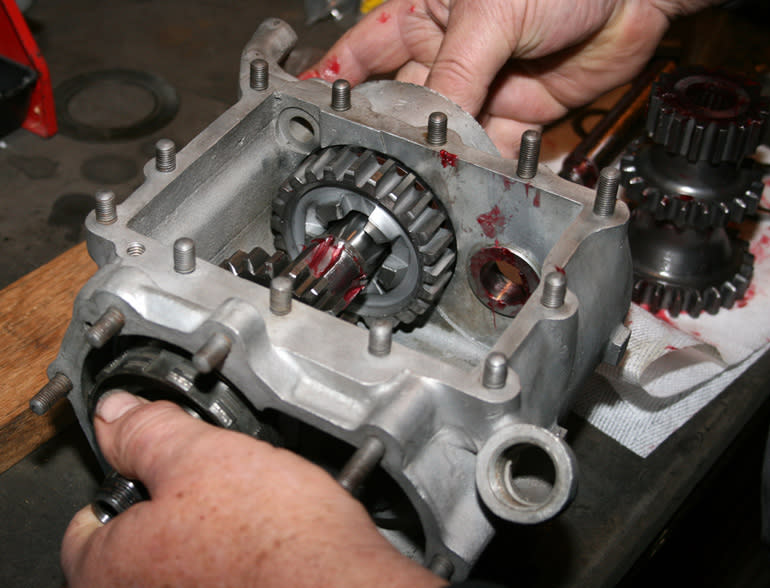
Experience goes a long way when rebuilding an original HD three speed transmission. Photo by Panhead Jim.
While the engine was off being rebuilt, I moved onto the frame and front end. The frame had been previously checked at a frame shop to make sure it was straight and true, so all it needed was a fresh paint job. I decided to "upgrade" from the original enamel paint to powder coating for a more durable finish and it looked so good I had the front end, rims and handlebars done to match. I'm a horrible painter, but I tackled the small parts myself and even set up a home parkerizing system. You don't hear much about parkerizing these days, but in the early 20th century it was one of the most common anti-corrosion treatments for metal parts.
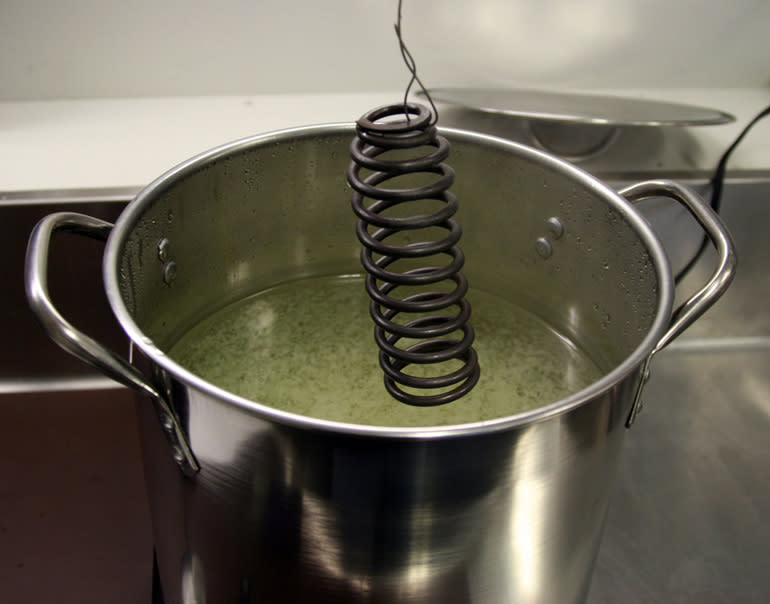
A stainless steel pot and hot plate are all you need for a home parkerizing system. Photo by Panhead Jim.
As expected, the unexpected cropped up just when everything seemed to be moving along smoothly. One of my cam shafts was too worn to be used in the rebuild. This started a nationwide search for a replacement shaft that in the end resulted in a NOS cam being located after months of hunting. On the plus side, it freed up my summer for riding my panhead, which had been suffering from serious neglect due to the '33 taking up all my available time.
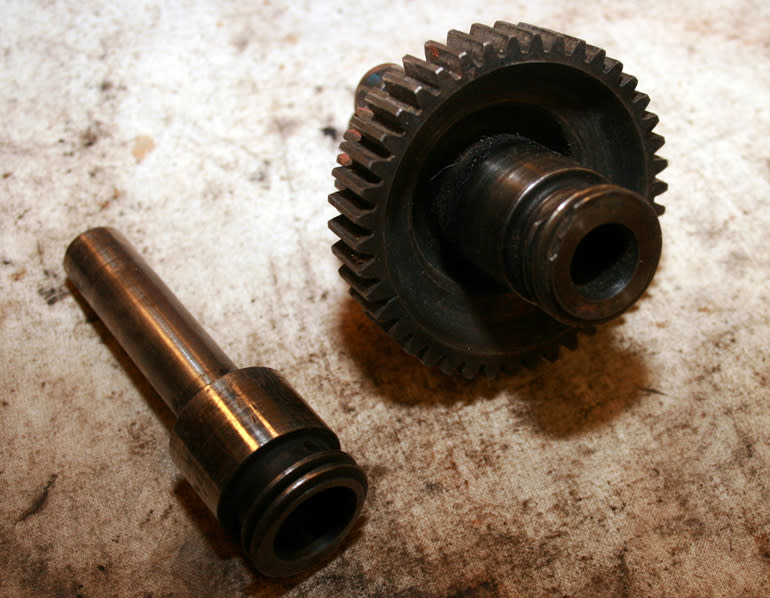
VL cams have removable shafts, which allowed me to keep my factory matched gears even when replacing a worn shaft. Photo by Panhead Jim.
When I finally got the engine back, the real fun began (and still continues). I literally had piles of parts, fasteners, sheet metal, etc., and only a vague idea of how it all went together. There is a book on VL restoration logically titled "Harley-Davidson 1930-36 Big Twins: Buying, restoring and riding a VL" and without which I would have been clearly lost. Even so, there was still plenty of head scratching staring at old pictures to figure out exactly how everything pieced together. The good thing is that 1930's technology is very straightforward, and with a little patience, you can usually figure it out.
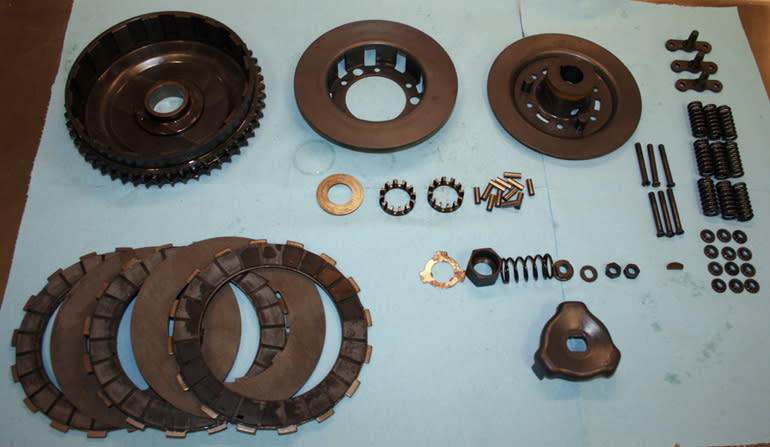
The clutch may have a lot of parts, but close inspection shows there is only one way they can be assembled. Photo by Panhead Jim.
With the project now in it's final months (hopefully), you may wonder what will happen with this bike. Will it ride from bike show to bike show on an enclosed trailer? Well, I can assure you that I'm not saving it just to ride on "sunny Sundays" or making it into a trailer queen. Instead, I plan to put some serious miles on it while I ride across the country this summer. I'll be joined by a long time friend on his 1934 VLD and we'll be riding from California to North Carolina sometime in August. Stay tuned to RideApart for updates as we cross the country, just two bikes and whatever tools/parts we can carry along. It will be an adventure of a lifetime for sure!
Special thanks to the great sponsors that have been a big part of making this build happen!
Sponsored By

MUST READ: 2015 Honda CB1100 Deluxe Review - The Modern Cafe | RideApart

Follow RideApart on Facebook and Twitter, along with @RideApart on Instagram.
