
 Yahoo Autos
 Project Car Diaries: Making My Civic Type R Faster With Downforce

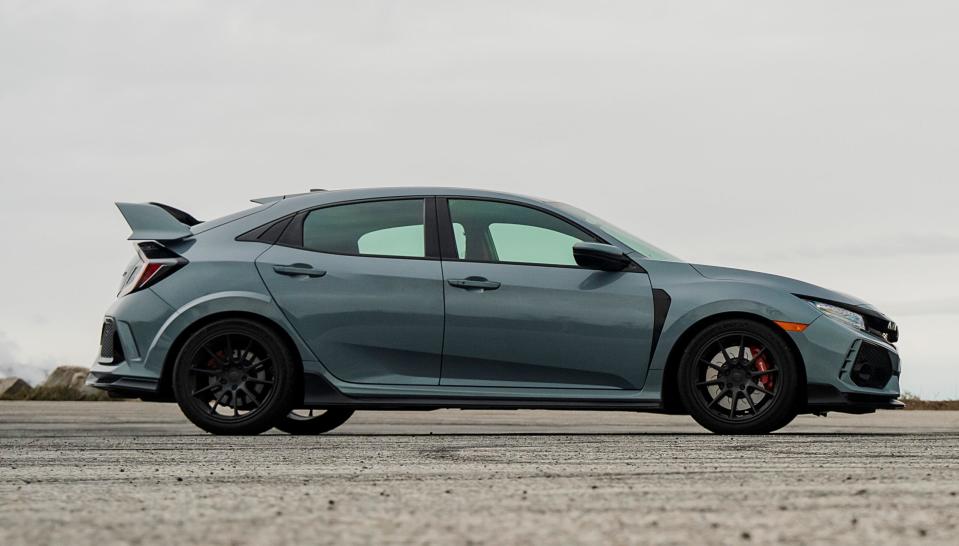
Within every track rat there are two desires: The deep need to spend money on parts to go faster, and the even deeper thought that “maybe I should just get better at driving.” I’m always working on my driver upgrades at track days and on my sim rig. That hasn’t stopped me from wanting to add parts to my 2019 Honda Civic Type R though, despite how well-engineered it was from the factory. I’ve seen improvements with sway bars, tires, and brake upgrades. But I wanted to explore something I’ve never done before: aftermarket aerodynamics.

The truth of where you should spend your money (seat time versus parts) is a bit of a mix. Don’t go crazy changing parts for the sake of changing them, but also develop your car to suit you and your style. The trouble is that my CTR is already extremely well-optimized in terms of handling. The stock adaptive suspension works so well that I don’t want to touch it unless it’s for a proper three-way motorsport damper, and the car does a lot of brake vectoring trickery that aids this handling at low speeds. Still, during my last track sessions at Buttonwillow Raceway Park, I felt that the CTR left something to be desired in terms of high-speed balance.

Strategizing for the Future
I could go crazy with suspension and ratcheting up rear stiffness until the car rotated how I wanted it to, but there’s one more thing besides cost and the fact that the suspension is good as-is; I want to compete with this car in grassroots time attack. Reading through the rulebooks of local time attack series and more serious ones like Global Time Attack (GTA), aero is a much more open avenue of development than suspension, with prescribed rules on the kind of suspension hardware you can run. There is lap time in good suspension, but for the money, I think subtle aero nets a bigger benefit.
So I started looking into aero. Frankly, I was skeptical of adding a big GT wing and calling it a day, knowing that I would likely add a lot of drag and a dose of understeer to the car. Nerds who watch F1 will be aware that having balanced downforce front-to-back on a car is much more beneficial than having the biggest wing and splitter possible.
What I wanted was a complete, off-the-shelf solution that could be a starting point but that didn’t get too aggressive. After some light research, Verus Engineering and APR Performance were my two options, but I preferred the lower cost and aesthetics of Verus, as well as the neat aero plots they posted on its site that demonstrate what the kit does in CFD.
After a few emails, Verus kindly sent me its Ventus 2 kit for the FK8 Type R to test on the street and track.
Manipulating Air
The FK8 CTR comes from the factory with considerations for aerodynamics. It has a mostly flat underbody, a functional rear wing, as well as fender slits that vent hot air from the engine bay through the hood scoop. Honda says the hood scoop/fender vent combo also contributes to downforce, though I’m personally skeptical of that. Either way, the CTR works out to be a zero-lift car rather than a downforce car from the factory, has no real aero on the front, and the rear wing profile is extremely tame and designed for minimal drag rather than downforce generation.
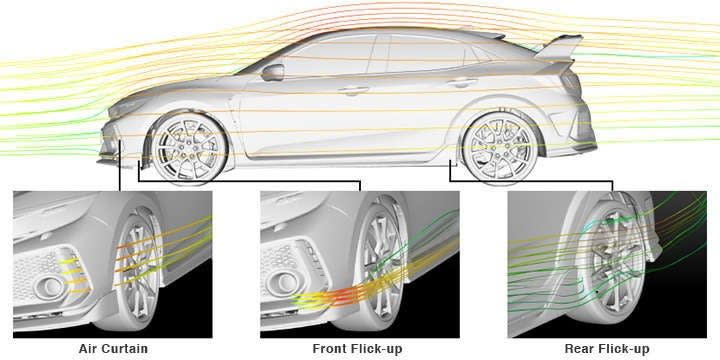
Verus Engineering took a 3D scan of a stock FK8 and put it into CFD software to develop its Ventus 2 aero kit, which includes a composite front splitter, carbon fiber canards, a more aggressively profiled carbon fiber wing, and an axle-back aluminum rear diffuser. It wasn’t developed in a wind tunnel (very few companies have access to such a thing) but was track tested to verify the CFD numbers. Also, it cleanly matched the factory aesthetics of the car, something I wanted to retain for this stage of my time with the car.
The company’s graph of this kit shows a decent increase in downforce without much drag penalty, with most of the downforce coming from the P10 wing and splitter. The wing is much more aggressively cambered than the stock wing, and about two pounds lighter. It has a three-dimensional profile and a much more aggressive aerofoil that will for sure generate more downforce. The splitter is relatively small but contributes to decent, efficient front-end downforce by causing suction underneath and also using the high-energy air at the nose of the car to also push down on the splitter where it meets the bumper, though that effect is smaller than the under-splitter suction.


Verus’ aero plots show some flow separation at the leading edge of the splitter, which is likely caused by the fully square profile of the splitter's leading edge. If you look at downforce cars, splitters are often shaped like the leading edge of a wing, which is rounded. The reasons why are simple: cost. Doing a nice rounded edge out of a cheap material is difficult, but more on that later.
The canards also don’t contribute to downforce per se but rather provide a vortice that extracts air from the wheel well. Meanwhile, the diffuser is the largest and most involved piece, including flat shrouds that sit close to the rear control arms and seal off the most turbulent part of the underbody where the exhaust normally lives. Again, this isn’t a huge downforce gain according to Verus, but is a definite decrease in drag. It looks quite cool too.
Installation
Installing the kit was shockingly straightforward, only taking some minor finagling to install the rear diffuser. First, the rear diffuser brackets had to get loosely bolted in, then the three-part diffuser and diffuser blades had to get loosely pre-assembled before offering the whole lot up to the car. I threaded the bolts closest to the center of the car first, then pivoted the diffuser up and threaded the bolts closest to the rear. From there, I could reach everything and tighten it into place while making sure the diffuser was adjusted properly to clear my aftermarket Fujitsubo exhaust.


Then I had to remove a plastic panel underneath the car and install threaded inserts into the panel for the splitter. Verus also provides splitter supports that are meant to extend out of the lower front grill, but I modified the installation slightly and moved the supports to behind the grill in the name of aesthetics. Instead of installing two threaded inserts, I used the holes to bolt the supports onto one of the inner bolt holes of the splitter. It is a little weaker on the leading edge of the splitter, but most of the downforce is generated at the center of the splitter. Thus, the supports actually support a more critical area while looking better than having the exposed stays. From there, the splitter simply bolts onto the bottom of the car.
